ESP-IDF:examplesでBLEの感じを掴む(ble_mesh_console/ble_mesh_node)#1
VSCodeでESP-IDFが(多分)使える様になりましたので、BLE MESHのサンプルを動かしてみようかと。
勉強中のためにて概要くらいしか知らない状態ですが、多分examplesを触れば何となく判るんじゃないかと
そんなわけでサンプルプロジェクトを持ってきます。
VSCodeではF1を押して、「ESP-IDF: Show ESP-IDF Examples Projects.」を開きます。

examplesが並んでいる中から「ble_mesh_node」をクリックし、「ble mesh node console demo」を選択、「Create project using example ble_mesh_node」ボタンを押します。
展開するディレクトリを聞かれますので指定してやると「ble_mesh_node」ディレクトリごとexampleプロジェクトが作成されます。

さて、README.mdを見ると、以下の様に書かれていました。
# ble mesh node console demo
## Introduction
This demo implements ble mesh node basic features.Based on this demo, node can be scaned and proved by provisioner, reply get/set message to provisioner.Demo steps:
https://github.com/espressif/esp-idf/tree/release/v4.0/examples/bluetooth/esp_ble_mesh/ble_mesh_console/ble_mesh_node
1. Build the ble mesh node console demo with sdkconfig.default
2. register node and set oob info, load model to init ble mesh node
3. enable bearer, so that it can be scaned and provisioned by provisioner
どうやらこのサンプルではプロビショナーに発見され、承認され、get/setメッセージを返すというものらしい。
プロビショナーがありませんが、、
sdkconfig.default込みですので、こういうのはまずはビルドしてしまって動かしてみてから考えようかと
コードを追うのが先かもしれませんが、intellisenseもincludeを正しく評価できてませんので(だるいので)、おもむろにビルドをポチります。
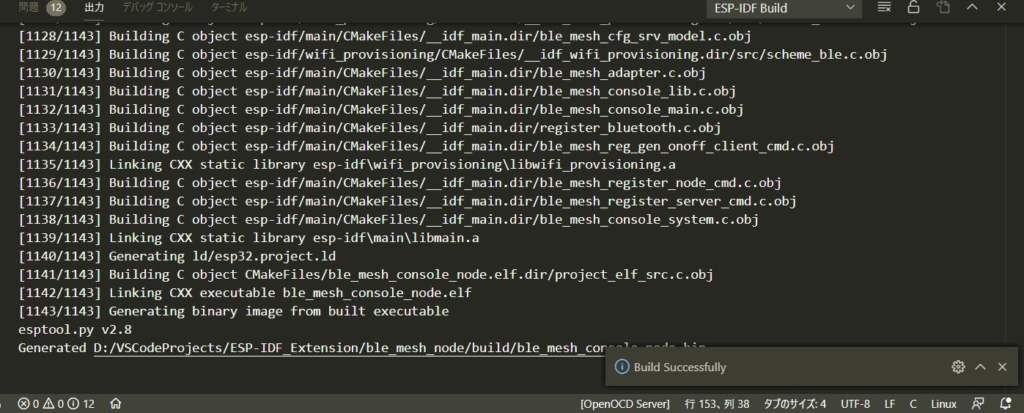
コンパイルは通った様です。
通ったなら大丈夫やろって事で、サッとESP32に書き込んでしまいます。
さて、、
チラ見した感じでは、コンソールで操作する様な実装がされているみたいですので、おもむろにシリアルモニターを起動します。
This is an example of ESP-IDF console component.
Type 'help' to get the list of commands.
Use UP/DOWN arrows to navigate through command history.
Press TAB when typing command name to auto-complete.
Your terminal application does not support escape sequences.
Line editing and history features are disabled.
On Windows, try using Putty instead.
esp32>
さっぱりわかりませんな
とりあえずhelpでコマンドリストが出る事、カーソルキーで操作できてコマンド履歴も出てTabでコマンドのオートコンプリートもできますお
それからwindowsのモニターではちゃんと動かないっぽいからPuttyを使えみたいな事が書かれているので、Puttyを、、
使ってないのでTeraTermで接続してみます。
文字化けてましたが、速度を115200bpsにしたらちゃんと出力される様に。
コマンドも何もわからないのでとりあえずhelpっと。
esp32> help
help
  Print the list of registered commands

free
  Get the total size of heap memory available

restart
  Restart the program

btmac
  get BT mac address

bmreg
  ble mesh: provisioner/node register callback

bmoob  [-s <value>] [-l <length>] [-x <size>] [-o <actions>] [-y <size>] [-i <actions>]
  ble mesh: provisioner/node config OOB parameters
    -s <value>  Static OOB value
   -l <length>  Static OOB value length
     -x <size>  Maximum size of Output OOB
  -o <actions>  Supported Output OOB Actions
     -y <size>  Maximum size of Input OOB
  -i <actions>  Supported Input OOB Actions

bminit  [-m <model>] [-c <index>] [-d <uuid>] [-p <publish>]
  ble mesh: provisioner/node init
    -m <model>  mesh model
    -c <index>  mesh model op
     -d <uuid>  device uuid
  -p <publish>  publish message buffer

bmnbearer  [-b <bearer>] [-e <enable/disable>]
  ble mesh node: enable/disable different bearer
   -b <bearer>  supported bearer
  -e <enable/disable>  bearers node supported

bmnreset
  ble mesh node: reset

bmsperf  -z <action> [-p <package>]
  ble mesh server: performance statistics
   -z <action>  action type
  -p <package>  package number

bmtxpower  -z <action> [-t <power>]
  ble mesh: set tx power or sense
   -z <action>  action type
    -t <power>  tx power or sense

bmnnwk  -k <net key> -n <net index> -u <unicast address> -d <device key> -a <appkey> -i <app index> -g <group address>
  ble mesh node: auto join network
  -k <net key>  network key
  -n <net index>  network key index
  -u <unicast address>  unicast address
  -d <device key>  device key
   -a <appkey>  app key
  -i <app index>  appkey index
  -g <group address>  group address

bmpublish  -d <data> -o <opcode> -m <module> -r <role> -a <address> -i <app key> -p <period>
  ble mesh: publish message
     -d <data>  message data
   -o <opcode>  operation opcode
   -m <module>  module published to
     -r <role>  device role
  -a <address>  unicast address
  -i <app key>  app key index
   -p <period>  period

bmgocm  -z <action> [-e <optional>] [-u <address>] [-s <state>] [-i <identifier>] [-t <time>] [-d <delay>] [-o <opcode>] [-a <appkey>] [-r <role>] [-n <netkey index>]
  ble mesh generic onoff client model
   -z <action>  action type
  -e <optional>  whether optional parameters included
  -u <address>  unicast address
    -s <state>  present onoff state
  -i <identifier>  transaction identifier
     -t <time>  time to complete state transition
    -d <delay>  indicate message execution delay
   -o <opcode>  message opcode
   -a <appkey>  appkey index
     -r <role>  role
  -n <netkey index>  network key index

esp32>
なぁチチ、オラぜんっぜんわかんねぇぞ!
フゥ・・・
さてどうしたものか
多分ですが、なんかこのコマンド群を用いて初期設定をすると、BLE MESHのノードが作られて色々できる気がするんですけど
やはり順番にソースを追っていかないとダメなのか・・・
なんてWEBをウロウロしていると
このデモに関するISSUESがありました。
■GitHub – ESPRESSIF – ESP-MDF – WANT a more detail instruction of esp ble mesh console demo #70
スレ違いではありますが、こちらのISSUESページによると、やはりプロビショナーを別途用意する必要があるらしい。
ble_mesh_console/ble_mesh_provisioner をダウンロードしてきてESP32にフラッシュしろとあるのですが、今回はちょっと省きます。(ぇ
だるいんですもの・・・
さて色々すっ飛ばしまして、「2.2 Implement the demo as a node」まで進みます。
Please follow the steps below to implement this demo as a node.

    1. Enter bmreg to register the ble_mesh_prov_cb and ble_mesh_model_cb callback functions.
        ・ble_mesh_prov_cb handles all events triggered when your board is provisioning other devices.
        ・ble_mesh_model_cb handles all events triggered when any server model of your board receives or sends any message.

    2. Enter bmoob -o 0 -x 0 to initialize the OOB information of your board as a node

    3. Enter bminit -m 0x1000 to initialize the model that is necessary for the provisioner's provisioning.
        ・The parameter -m stands for model and its value 0x1000 indicates the model ID of the Generic Onoff Server model.

    4. Enter bmpbearer -b 0x3 -e 1 to enable bearers, which include the PB-ADV bearer and the PB-GATT bearer.
        ・The parameter -b stands for "bearer" and its value 0x3 indicates both the PB-ADV bearers and the PB-GATT bearers are enabled;
        ・The parameter -e stands for "enable" and its value 1 indicates to enable the bearer.

    After this command, the provisioner now can send and receive messages.
ノードを実装する箇所を読むと、bmregを実行してコールバック関数としてble_mesh_prov_cbとble_mesh_model_cbを登録するとあります。
ble_mesh_prov_cbハンドラは他のボードがプロビショニングされた時等にトリガーされるイベントを処理し、
ble_mesh_model_cbハンドラは自身がサーバーモデルとしてメッセージやら何からを受信した時のイベントを処理する、と。
ble_mesh_prov_cb は、ノードに対する操作やメッセージが来た時のハンドラで、
ble_mesh_model_cb は、ノードの自分宛メッセージを受け取った時に何かするためのハンドラみたいですね。
どんな処理が仕込まれているかソースを見ても居ませんが、とりあえずハンドラの登録をしない事にははじまらないっぽいので試しにコンソールに打ち込んでみます。
esp32> bmreg
I (4645) ble_mesh_node_console: Node:Reg,OK
なんか登録された模様。
さて次に、ボードのOOB情報をノードとして初期化します。
bmoob -o 0 -x 0 と打つらしい。
esp32> bmoob -o 0 -x 0
I (82815) ble_mesh_node_console: OOB:Load,OK
なんか初期化できたみたいですね
次にボードのモデルを登録するらしい。
解説ではとりあえずGeneric OnOff Serverモデルを登録するとあります。
0x1000 がそのGeneric On/Off Server Modelみたいですね。
esp32> bminit -m 0x1000
I (244145) ble_mesh_node_console: Provisioning:Register,OK
なんか設定できたみたいです。
次に、ベアラーを有効にするとか。
例では「bmpbearer -b 0x3 -e 1」とありますが、多分タイプミスで、「bmnbearer -b 0x3 -e 1」でしょう。
esp32> bmnbearer -b 0x3 -e 1
I (421655) ble_mesh_node_console: Node:EnBearer,OK
なんか有効になったみたいです。
これでノード側の準備は出来たっぽい?様ですので、プロビショナーにプロビションしてもらいます。
今回はESP32で作らずに、BLE対応のスマホアプリを使わせていただいてしまいます。
■NORDIC SEMICONDUCTOR – nRF Mesh – Mobile apps for Bluetooth mesh provisioning, configuration and control.
NORDIC SEMICONDUCTORはbluetooth関連のチップを作っているメーカーみたいですね。
ソースコードまで公開していてとてもありがたいでする。
GooglePlayから導入できるので、これをインストールして起動してみます。
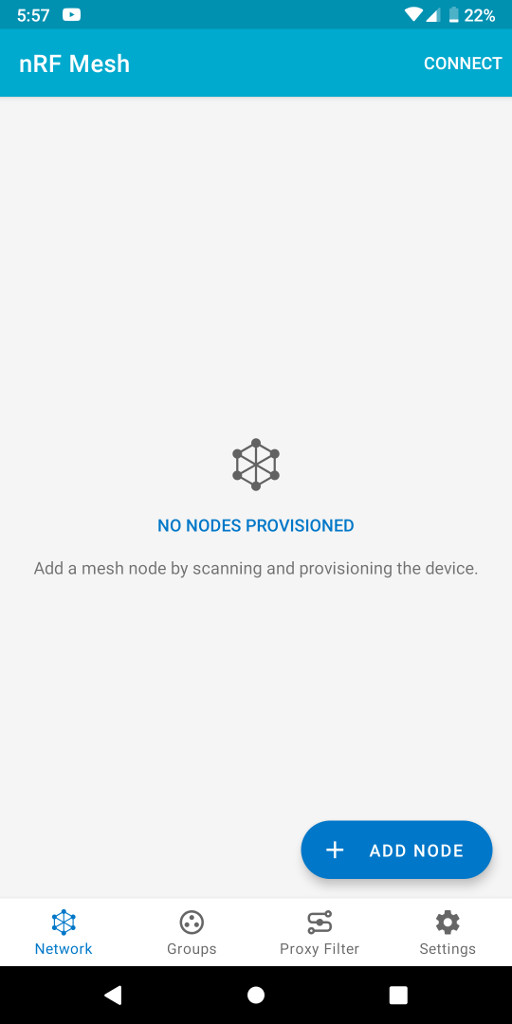
おお、なんかソレっぽい。
現在「Network」タブで、「+ ADD NODE」を押せば多分BLE MESHデバイスがスキャンできるんじゃないかと。
「Group」はノードグループか何かの設定かな
「Proxy Filter」は、、、よくわからんす
「Settings」はこのプロビショナーの基本設定が多分できるぽ
とりあえず先程初期設定をしたESP32がちゃんと動作しているかスキャンしてみます。
「+ ADD NODE」をポチっとしまして
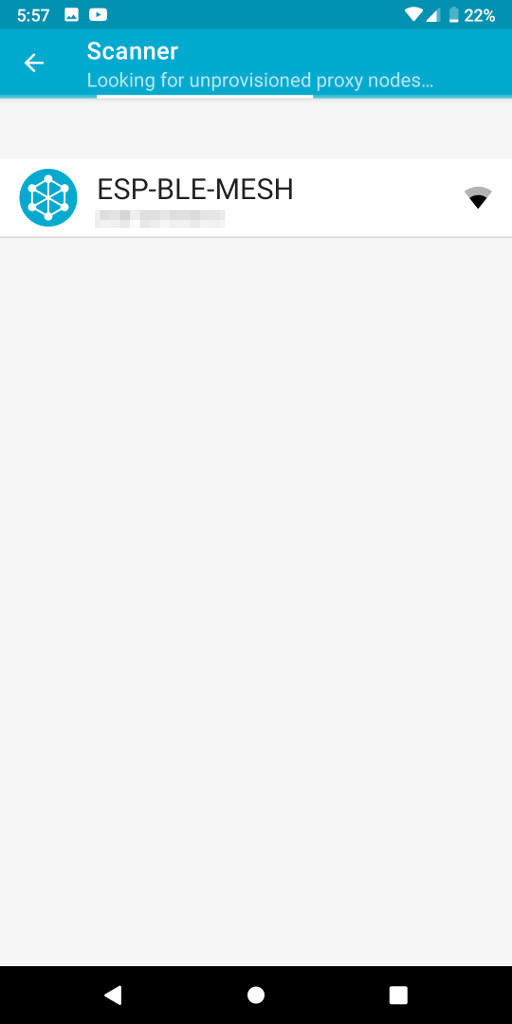
うぇーい。ソレっぽいデバイスが出てきました。
※モザイクの所はBluetoothのMACアドレスです
この近辺でESP32でBLEを使おうとしている人は多分居ませんので、恐らくコレです。
早速ポチってみます。
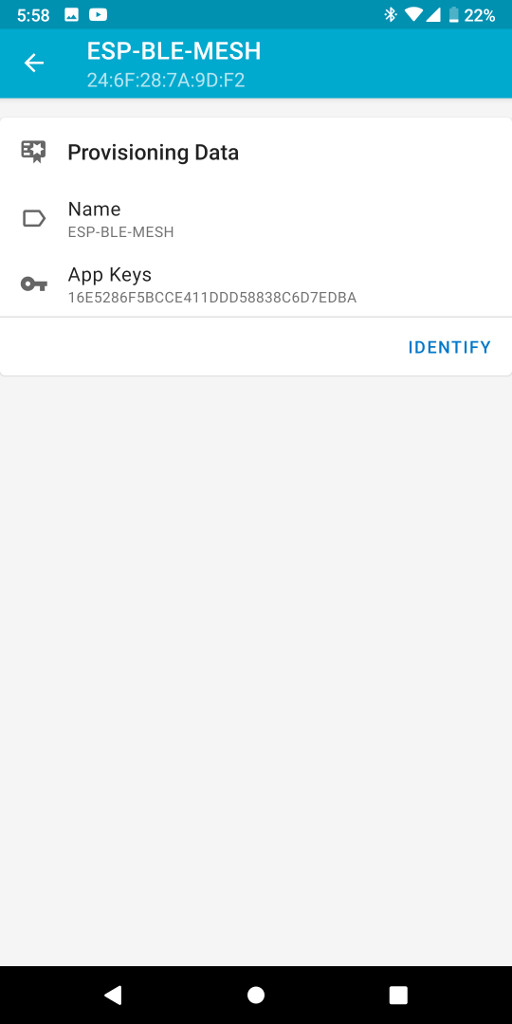
なんか出てきましたね。
Provisioning Dataとありますので、この内容でプロビショニングしますよって事なんだと思います。
右下にあるIDENTIFYが押せそうなのでちょっと押してみます。
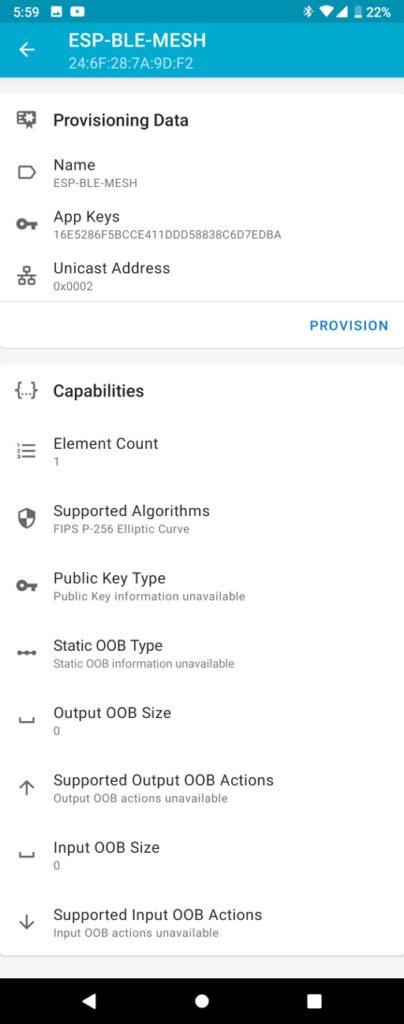
個別のデータが何を示しているのかサッパリわかりませんが、なんかこのESP32のBLE的な設定内容が出ている気がします。
先程押した IDENTIFY が PROVISION に変化していますので、多分これを押せばプロビショニングできるんじゃないかと・・・
そんなわけでサクサクと押しますぇ。どんどん押しますぇ
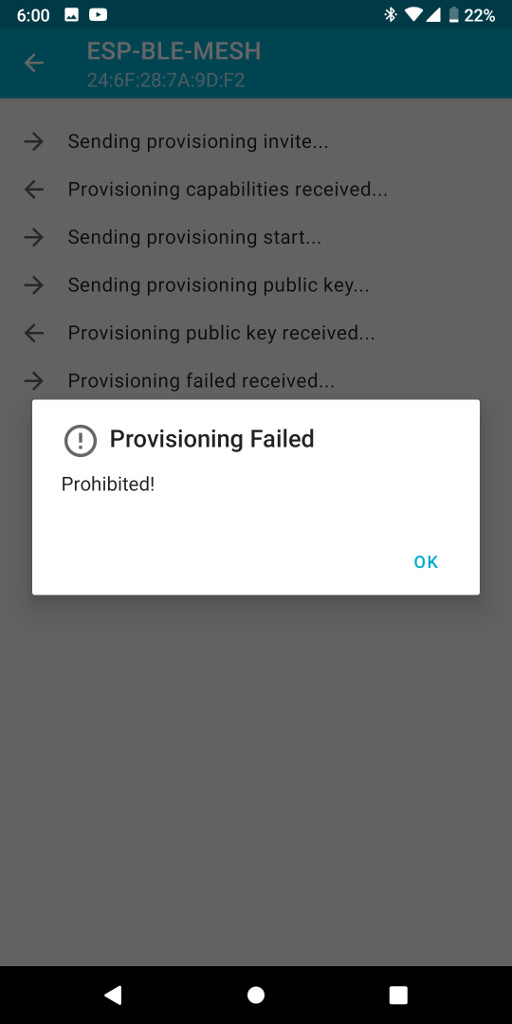
んごぉ?
なんかエラーが出たンゴ
全くさっぱりわかりませんが、とにかく禁止されてしまぃorz
うん、基礎知識が無いと全く手も足も出ませんな
一体何が起こっているのかサッパリです。
プロビショナーを外部ツールで代用したのがいけないのか、なんかパラメータが違うのか、、
ちょっと頑張って調べてみます・・・
※その後頑張って調べたら、手掛かりを見つけたンゴ
内容は次の記事で・・・

 https://github.com/espressif/esp-mdf/issues/70
 https://www.nordicsemi.com/Software-and-Tools/Development-To...






ディスカッション
コメント一覧
まだ、コメントがありません